Through adversity comes tragedy or greatness. The way it goes depends on you. It comes down to attitude. You can choose to be a "victim", or you can choose to live your life. Your own terms, your own adventure.
I'm choosing my own terms, creating my own adventure.
I WILL be who I want to be.
I WILL be present.
I WILL prepare and follow my plan.
I WILL make everything I work for come to be.
My "actual" goals for this year are to participate in the Powell 3 Triathlon in October. To be half the person I currently am. Physically. ;) To re-enter the world and stop hiding from it. I'm so excited to begin working with Natalie Jill! I won't be able to start until February, so until then I'm going to try this. I'm really excited!
I'm going to slow down and FOCUS. I can't continue jumping from one thing to the next before I've finished anything. I can't continue to do everything, because in the end I get nothing accomplished and I end up ignoring what really matters. I'm going to focus and simplify. Such a strange concept, I know. ;)
I'm going to take the kids out on our family adventures that we used to have. A walk to Bridal Veil. Finding new trails to explore. Keeping it simple and just about being together. They're getting too big, too fast.
This is going to be our year!
October 27, 2011
September 20, 2011
Puppy Bed
When my kids and I moved into our apartment after getting the job with My Mind's Eye, I realized that these apartments are PET FRIENDLY! I've been wanting to get a puppy for a long time and I just couldn't resist starting the search for our newest family member.

Could YOU say no to that little face? I sure didn't. ;) I named him Perseus. I LOVE Greek mythology, and the kids love the movie Percy Jackson and the Lightning Thief, so it fit. We call him Percy. He is such a sweetheart!
I've had an idea for a puppy bed project for a long time, and finally had a reason to make it! Here are the materials needed, all of which can be found at Roberts:

• Batting
• Fabric
• Patterned Paper
• Boards
• Thread
• e6000
• Mod Podge (not pictured)
• Spray Paint (not pictured)
• Wood candlesticks (4)
• Wood balls (2" or so in diameter) (4)
• Buttons (optional. I ended up not using them for THIS project. lol)
First, spray paint the boards and let them dry. Then, using e6000, glue the wooden balls to the candlesticks. Let that dry, then spray paint them as well.

I cut my patterned paper into 2" squares, then Mod Podged them onto the tall boards. I applied a layer of Mod Podge over the top to seal them. Once it dried, I took a pen and outlined the squares and drew squiggles here and there.


e6000 the candlestick/ball things to the bottom of your base board. These are the legs of the bed. Let dry. To attach the two "headboards" together, I used a staple gun to staple a thin board behind them to secure them together. Then I did the same to attach the base to the headboard.
To make the cushion, I cut two squares out of my fabric and sewed them together, wrong sides facing together, leaving a hole on one side. Turn it right side out and fill with batting, inserting the batting in the hole. When it's filled, sew up the hole.

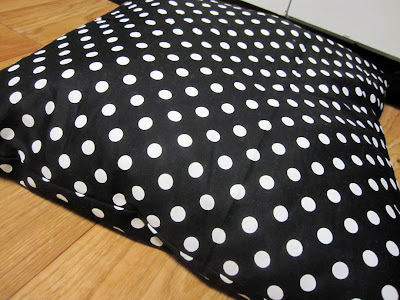
Then put the cushion on the bed and you're set!


Percy loves his new little bed! He kept laying down on it, but he'd jump up and run every time I tried to take a picture. Figures, right? haha!
September 19, 2011
Meal Ideas
So after the gym's been closed for maintenance the last two weeks, it's finally reopening tomorrow! I've severely slacked the last two weeks. :S I spent most of today cooking and getting my meals ready for the week. Here's what I'm doing this week:
Breakfast: Oatmeal with a little bit of brown sugar, raspberries and blackberries.

Morning snack: Yogurt, almonds and a string cheese. Confession. I know Greek yogurt is much better and higher in protein. But I don't like how it tastes. If anyone knows of a YUMMY Greek yogurt, I'm all ears! lol!

Lunch: Spaghetti squash w/ marinara sauce and a broccoli/cauliflower salad. (For the salad, chop up a head of broccoli and a head of cauliflower. Cook up some bacon, and throw in some cashews. Mix mayonaise, sugar and vinegar to taste for the dressing. I don't use a lot of dressing on my salad, just enough to get the flavor.)
I absolutely adore spaghetti squash! To prepare it, cut it in half and scoop out all the "guts." Just like a pumpkin. Poke holes in the skin, turn the halves squash side down, and bake. (I baked it at 350º for about 40-50 minutes.) Using a fork, scrape out all the "spaghetti."


I cut off all the fat before I even cook the bacon. Make it a LITTLE bit "healthier." hahaha!

YUUUUMMMMM!!!

Afternoon snack: Sugar Free Jello Pudding Snack thingy. Chocolate mousse. Hits the spot! I didn't take a picture of it. lol
Dinner: BBQ Chicken over brown rice. I used Stubbs chicken marinade. I WISH I had a bbq here!! It's the only way to have chicken!

Hopefully that gave you some ideas for meals and snacks!! I'm closing in on my 6 month deadline for my first goal, and I'm so far away still. Hopefully there will be no more set backs so I can push through and hit my goal! :D
Have an amazing day everyone!!
September 18, 2011
Crayon Art - Project In Progress
Here is one of those other projects I wanted to get to for the upcycled blog hop. I had SO much fun with this one, I really want to go out and get a bunch of canvases to try different color combinations!
I haven't finished this one off yet, but I wanted to show you what I've done with it so far.

Normally, I don't usually go so completely abstract with my projects. I had to let go of a lot of my perfectionism on this one. Not that I ever really follow any rules or instructions at all, this was still just so out of my element and comfort zone.
So far, this is just the start of a background for a mixed media piece. The blob of swirled color in the middle there is melted crayons, swirled together. I laid my patterned paper down with Mod Podge, added texture with mesh, puncinella (I'm 100% positive I spelled that wrong), cream and white paint. Then I took a green, blue, red, orange and yellow crayon and laid them in different places on the canvas. (The canvas is 6x12") Using a heat gun, I melted the crayons. I tilted the canvas in different directions to let the wax run. I also used the non brush end of a foam brush to swirl it around a little more, then just dabbed the wax off the brush onto the canvas. Once it cooled, I added some more paint texture. I want to work with it some more, it doesn't feel finished to me yet.
I'll add pictures, for sure, when I get it finished up. :)
September 17, 2011
Upcycle Blog Hop
This has been one of my most favorite hops that I've been a part of. I LOVE upcycling projects! What better way to push and test your creativity and try new things? I had so many ideas for this one that I had to narrow it down to a few. For this post, at least. I'll post the other projects I did over the next few days.
If you came here from Tanya's blog, http://www.ScrappyScavenger.wordpress.com/, then you're in the right place. If not, go there and start there. Mine is the second blog in the hop. :D
I apologize in advance for the poor quality of photography! I was hoping for a sunny day to use the natural light, but it was SO overcast and rainy, so I just had to suck it up and make do. The lighting in my apartment is TRULY horrible, it hurts my photographer heart. ;)
So the first project is one I've been wanting to try for a while, but haven't had the guts to. My mom bought me a china plate from the thrift store a few months ago, specifically for this project. But it just goes against the grain to BREAK something like a china plate. So it's taken me until now to work it up to take a hammer to it.

As a plate, it really wasn't all that great, so I don't know what my problem was. lol!! Not my style for China.

I took some adhesive backed copper foil and wrapped it around the edges:

 Once it's cooled, wipe off the flux and polish the solder with a soft cloth. Then, to add a little decoration to it (and to cover the funny bottom corner), I adhered two flower cabachons with some Glossy Accents.

Then just add a chain and you have a fun, truly unique jewelry piece!
My next project was a little more simple. I've been wanting to make something to hold the kids artwork. I hate having things cluttered on the fridge with magnets, but I definitely wanted to be able to display their creativity. Believe me, they have it in bounds! I found 4 clipboards at the thrift store for 50¢ each. I had some leftover paper from My Mind's Eye's Stella & Rose collection. Seriously one of my favorites of theirs!

I used a strip showing the backside of each paper to cover the space at the bottom that didn't get covered by the first piece I glued down. All I did was cut the paper 9" across. It was leftover paper from another project. I'm not sure what the length was. lol! But it left about an inch and a half at the bottom of the clipboards. I just cut a notch out of the top to accomodate the clippy part of the clipboard and Mod Podged it to the board. Can't wait to add some of the kids' artwork to it!
I'm really excited about my last project! I wanted to create a little reading nook for my daughter in her room. My older brother describes her perfectly when he says she's like a Disney Princess, and when you meet her you expect to see woodland creatures following her around doing her bidding. lol! She needs some type of canopy in her room! She has a 4 post bed, but it's not built for a canopy. SO. I found an old lampshade at the thrift store and thought it would make the perfect base for this canopy! Now, this is a NO SEW project! It's all hot glue my friends. You're welcome. ;)

I took 1.5 yards of linen and hot glued it in pleats around the top of the lampshade. Then I took the quatrefoil patterned fabric and glued it in pleats down the front. Glue the linen to cover the rough edges of the quatrefoil. I cut strips of black netting and gathered it around the top and the base where the linen fabric left an opening and glued it down.
Then I cut a "starter cut" randomly around the bottom edges of the linen and ripped it up to the base of the lampshade. I liked the wild, rough, unfinished look this gave it. I think it made it more whimsical. I took strips of coordinating brocade, polka dot and striped fabric and tied them randomly around the linen strips for some color and more whimsical fun. It's hard to see in the badly lit photos, but I also glued a floor length of shiny, glittery cream netting that will hang down around a comfy chair.

Now I just need to hit the thrift store again and find the perfect comfy chair! I've always wanted to try my hand at refinishing a chair! :D
I can't wait to post my other projects I've been working on!!
Thank you SO MUCH for stopping by! I really appreciate having you here! Next up is Janice at http://www.cricutconfessions.com/ Have so much fun!! And check out the other hop I am a part of this weekend, the 50 States Blog Hop. There are some fun projects and fantastic prizes up for winning!
-Brie
If you came here from Tanya's blog, http://www.ScrappyScavenger.wordpress.com/, then you're in the right place. If not, go there and start there. Mine is the second blog in the hop. :D
I apologize in advance for the poor quality of photography! I was hoping for a sunny day to use the natural light, but it was SO overcast and rainy, so I just had to suck it up and make do. The lighting in my apartment is TRULY horrible, it hurts my photographer heart. ;)
So the first project is one I've been wanting to try for a while, but haven't had the guts to. My mom bought me a china plate from the thrift store a few months ago, specifically for this project. But it just goes against the grain to BREAK something like a china plate. So it's taken me until now to work it up to take a hammer to it.

As a plate, it really wasn't all that great, so I don't know what my problem was. lol!! Not my style for China.

I took some adhesive backed copper foil and wrapped it around the edges:

Paint the copper with flux. Then take a coil of solder and a soldering iron. Heat the end of the solder coil with the iron tip. A dob of solder will melt onto the tip. Paint it along the copper like a paintbrush. Hold the china piece with clamps, to avoid burns. Then, once you've soldered all the way around, apply flux to one side of two jump rings. Paint a little more flux onto the spots you want to attach the jump rings. Grab some more solder with your iron and holding the jump ring with another clamp next to where you painted the solder onto the china piece, apply the solder to the jump ring. The flux tells the solder where to go. Solder will only apply to where there is flux.


Then just add a chain and you have a fun, truly unique jewelry piece!
My next project was a little more simple. I've been wanting to make something to hold the kids artwork. I hate having things cluttered on the fridge with magnets, but I definitely wanted to be able to display their creativity. Believe me, they have it in bounds! I found 4 clipboards at the thrift store for 50¢ each. I had some leftover paper from My Mind's Eye's Stella & Rose collection. Seriously one of my favorites of theirs!

I used a strip showing the backside of each paper to cover the space at the bottom that didn't get covered by the first piece I glued down. All I did was cut the paper 9" across. It was leftover paper from another project. I'm not sure what the length was. lol! But it left about an inch and a half at the bottom of the clipboards. I just cut a notch out of the top to accomodate the clippy part of the clipboard and Mod Podged it to the board. Can't wait to add some of the kids' artwork to it!
I'm really excited about my last project! I wanted to create a little reading nook for my daughter in her room. My older brother describes her perfectly when he says she's like a Disney Princess, and when you meet her you expect to see woodland creatures following her around doing her bidding. lol! She needs some type of canopy in her room! She has a 4 post bed, but it's not built for a canopy. SO. I found an old lampshade at the thrift store and thought it would make the perfect base for this canopy! Now, this is a NO SEW project! It's all hot glue my friends. You're welcome. ;)

I took 1.5 yards of linen and hot glued it in pleats around the top of the lampshade. Then I took the quatrefoil patterned fabric and glued it in pleats down the front. Glue the linen to cover the rough edges of the quatrefoil. I cut strips of black netting and gathered it around the top and the base where the linen fabric left an opening and glued it down.
Then I cut a "starter cut" randomly around the bottom edges of the linen and ripped it up to the base of the lampshade. I liked the wild, rough, unfinished look this gave it. I think it made it more whimsical. I took strips of coordinating brocade, polka dot and striped fabric and tied them randomly around the linen strips for some color and more whimsical fun. It's hard to see in the badly lit photos, but I also glued a floor length of shiny, glittery cream netting that will hang down around a comfy chair.

Now I just need to hit the thrift store again and find the perfect comfy chair! I've always wanted to try my hand at refinishing a chair! :D
I can't wait to post my other projects I've been working on!!
Thank you SO MUCH for stopping by! I really appreciate having you here! Next up is Janice at http://www.cricutconfessions.com/ Have so much fun!! And check out the other hop I am a part of this weekend, the 50 States Blog Hop. There are some fun projects and fantastic prizes up for winning!
-Brie
September 16, 2011
50 States Blog Hop - UTAH!
Welcome to the 50 States Blog Hop!!
Welcome to the 50 States Blog Hop! This hop was inspired by our host Shawnee's journey across the United States as she traveled with her family to their new home, and I am SO excited to be a part of such an incredible hop. The work that has gone into coordinating this hop is just beyond my comprehension, and I feel honored to be a part of it.
If you've hopped along from WYOMING, with Theresa, then you are in the right place!! If you are just joining me from your dashboard or happened along from somewhere else, please be sure to CLICK HERE to start with the first state in the union, Delaware, because you won't want to miss out on any of the fun (or any of the blog candy!!)...
There is an AMAZING Grand Prize Package for one LUCKY hopper (winner chosen by Rafflecopter)!! To be entered to win, please do the following:
- Visit each state and leave a comment on each project (simply follow the links provided below)
- Like Blessed on the Bright Side and Handmade By Lisa FB Pages.
Cricut Cartridge - Destinations, beautiful handmade flowers from Shannon at Creative Chaos Flowers, and a $20 Gift Certificate to Scraptastical Kreations.
Now on to my state and my project....
Now, on to the project I created to represent UTAH.
Utah is known for a great many things. I've lived here my whole 27 years, and have found so many things to love about it. 4 very distinct seasons, you can travel an hour or two in any direction and get a completely different landscape from the mountains, to lakes, to desert to strange rock formations, such as Goblin Valley. But, the one thing we're most known for (aside from Mormonism, and no, polygamy is not a part of Mormonism LOL) is our SNOW! It's even on our license plates:

GREATEST SNOW ON EARTH.
So I thought about a project I could do involving snow. I'm not one for cheesy, seasonal decorations. So I knew whatever I did had to be a mix of contemporary and vintage design, probably geared more towards the holidays. (Christmas snow is the BEST!) I was perusing Pinterest the other day instead of doing something I probably should have been doing and came across some little Christmas trees made from book paper.
Done. Found my project! I, of course, expanded upon it to give it my own personal touch.

It's SUPER easy. The book I used is one I found at our local thrift store, Deseret Industries. It was a 1965 edition of Shakespeare's tragedies. LOVE me some Shakespeare!
I took the book to the FedEx Office where I used to work. Fortunately, I used to work there, because no one there dared to cut the spine off the book. So they let me do it instead. This gave me a nice, clean edge.

First, take a page and fold in diagonally.

Then fold it diagonally again. Kind of like a paper airplane.

I apologize for the poor lighting in the photos. The lighting in my apartment is horrible! :S
Next, fold the little triangular piece at the bottom up into the page, tucking it in.

Make a BUNCH of these. I took one page and rolled it into a tube about 1/4" wide. I used this as my "base" to glue the triangular pieces to. Using hot glue, I attached the triangular pieces to the tube, all around the tube.

Top View:

Bottom View:

Now here's where I added my own "Brie" touch. I figure, if it's not glittery, then it's not Christmas. Am I right? ;) I rolled the top part into a pool of Mod Podge, letting it drip down the pages and run unevenly. I wanted no uniformity in this.

Then, I sprinkled some aqua/teal-y glitter onto it. (Teal/Aqua are SO my colors right now!)

I probably COULD have stopped there. But it felt . . . like it still needed something. Which, I just happened to have some blue buttons sitting in front of me for another project I was working on. So I hot glued them right onto the papers. I really love the extra touch they added!

So that's my project! Christmas > Snow > UTAH! I want to make a few more, in different sizes, and make a little "forest" to display on my table. I hope you enjoyed it, and I hope you're having an amazing time hopping through the country!
Now you can hop to the NEXT STATE IN THE UNION!! Remember to leave a comment on each state to be eligible for the GRAND PRIZE!!

.............

August 16, 2011
Hilarity
Oh my gosh, my kids crack me up! I was cooking dinner and I could hear the sounds of them "rehearsing" a play to perform for me in the boys' room. When I finished cooking, they performed for it for me, asking me to film them. After dinner, I edited the film and this is what we got:
(They were SOOOO excited to see themselves in a "REAL" movie! LOL LOVE THEM!)
While I was editing this video, they began practicing for another movie. "LIGHTNING HEROES!"
Welcome to Hollywood, kids. You're already making sequels. lol!
(They were SOOOO excited to see themselves in a "REAL" movie! LOL LOVE THEM!)
While I was editing this video, they began practicing for another movie. "LIGHTNING HEROES!"
Welcome to Hollywood, kids. You're already making sequels. lol!
August 5, 2011
Personality Types
I was reading the blog of a friend of mine, and she had taken the INFP personality test. I'd taken one before, but it's been a while and I was interested to see where I am currently at. It's really a fun little test, and an ego trip to read about your personality. lol!
Apparently, I fall into the category of "Teacher." I like the sound of that! :D
Here's what it had to say about me:
Even more than the other Idealists,Teachers have a natural talent for leading students or trainees toward learning, or as Idealists like to think of it, they are capable of calling forth each learner's potentials. Teachers (around two percent of the population) are able - effortlessly, it seems, and almost endlessly-to dream up fascinating learning activities for their students to engage in. In some Teachers, this ability to fire the imagination can amount to a kind of genius which other types find hard to emulate. But perhaps their greatest strength lies in their belief in their students. Teachers look for the best in their students, and communicate clearly that each one has untold potential, and this confidence can inspire their students to grow and develop more than they ever thought possible.
In whatever field they choose, Teachers consider people their highest priority, and they instinctively communicate personal concern and a willingness to become involved. Warmly outgoing, and perhaps the most expressive of all the types, Teachers are remarkably good with language, especially when communicating in speech, face to face. And they do not hesitate to speak out and let their feelings be known. Bubbling with enthusiasm, Teachers will voice their passions with dramatic flourish, and can, with practice, become charismatic public speakers. This verbal ability gives Teachers a good deal of influence in groups, and they are often asked to take a leadership role.
Video Profile of an Idealist Teachers like things settled and organized, and will schedule their work hours and social engagements well ahead of time -- and they are absolutely trustworthy in honoring these commitments. Valuing as they do interpersonal cooperation and harmonious relations, Teachers are extraordinarily tolerant of others, are easy to get along with, and are usually popular wherever they are.
Teachers are highly sensitive to others, which is to say their intuition tends to be well developed. Certainly their insight into themselves and others is unparalleled. Without a doubt, they know what is going on inside themselves, and they can read other people with uncanny accuracy. Teachers also identify with others quite easily, and will actually find themselves picking up the characteristics, emotions, and beliefs of those around them. Because they slip almost unconsciously into other people's skin in this way, Teachers feel closely connected with those around them, and thus show a sincere interest in the joys and problems of their employees, colleagues, students, clients, and loved ones.
July 10, 2011
Linking Partay!
Be sure to check out all the fun links over at the Craft-O-Maniac blog! Gotta love the link parties. I find SO many fantastic blogs and projects that I never would have found otherwise!

July 4, 2011
June 30, 2011
And So It Begins . . .
Ok my friends. It begins tomorrow. The challenge. The competition. The rest of my life!
A few weeks ago a friend of mine, and fellow blogger, Dan (check out his blog, it's amazing! http://www.danoah.com/) posted that he was going to do a Biggest Loser style competition. Of course I jumped on that! Number one, I don't back down from a challenge. Number two, it seemed like a fantastic way to get me super motivated to stay on track. Number three, it perfectly coincided with my plan to incorporate training and getting healthy into my blog here. Luckily, Dan held a spot for me.
It starts tomorrow. I am SOOOOOOOOOOO excited!! I'm gonna get myself from this:

Back down to THIS!

Look at me! I had collarbones!!! hahaha! I can not wait to get back to that level of fitness and health! And I'm gonna STAY there this time! No more getting lazy, making excuses, psyching myself out or anything negative like that. It's on. It's done. LET'S GO!
(The top picture is from a photoshoot done last Sunday with my friend and design partner Blake. You'll start seeing and hearing a lot more about him in the next few weeks as we get ready to launch all kinds of awesomeness on the world!)
The last week of interacting and chatting with my fellow competitors has been simply amazing. There are no words to express how grateful I am for each of them for the support, kind words and hilarity that has gone down in the group. I already feel so close to each of them, and I know we're gonna be friends for life after this! I HIGHLY recommend getting into a group such as this. I haven't felt so loved, accepted or laughed so hard in a long time! :D So thank you to everyone in the competition. Ya'll are amazing!
So if you missed it, check out my last post that has all my training materials that I will be using to keep me organized and to keep track of my progress. You can click on the pictures and it will take you to where you can download them to your computer.
I'm so excited to get back into shape and get my life and my "physical" confidence back! (I'm plenty confident, personality wise. lol! I gotta get my outside matching! ;)
Is everyone else ready to get this party started?
I thought so.
June 28, 2011
Training Materials
Ok, so I've been working on getting everything organized so I can feel like I have a plan for when I start training. I joined a Biggest Loser style competition, and I'm in it to WIN! And to support everyone else in the competition, because it's really about helping each other and having a group to cheer you on, I think. And having a group to keep one motivated! So while I created these sheets for me, I wanted to share them for anyone to use if they wanted. (Some of the templates I got from www.mommytrackd.com and I filled them out, if you want to see what other template things they have.)
First, I created a calendar, so I could keep track of what workouts I want to do each week. Which muscle group I want to work on what days. (This is a blank sheet that if you download and follow me, you can fill it out as we go. Then you have a written plan for you to go back to.)

I also created a calendar for July, in case anyone preferred that.

Then there are measurement trackers for both men and women.


Here is a blank menu planner:

Then here are the ones I'll be following. Yes, I eat the same thing everyday for a week at a time. It makes it easy to prepare ahead of time and it's SUPER cost effective. I have the first 4 weeks planned. You definitely don't have to follow what I do, by any means. But there might be a meal idea on there for you. :)
Week 1:

Week 2:

Week 3:

Week 4:

For the first 4 weeks I'll be going vegetarian, to help cleanse all the junk that's been building up in my body. I'll be doing strength training but the first few weeks will be MOSTLY cardio, to really help jump start the actual pounds coming off. And to keep me in the competition! ;)
So, to anyone in the competition who is reading this: GOOD LUCK TO US ALL!!! It's going to be amazing and I can't wait to see everyone's "after" pics! And to everyone else reading this, I'm excited to share these things with you and hope someone finds something useful in them. :) I'll have the first video of exercises posted hopefully by next Monday. YAY!
HERE WE GO!
Click on any of the pictures to download them to your computer. It will take you to a different site.
First, I created a calendar, so I could keep track of what workouts I want to do each week. Which muscle group I want to work on what days. (This is a blank sheet that if you download and follow me, you can fill it out as we go. Then you have a written plan for you to go back to.)
I also created a calendar for July, in case anyone preferred that.
Then there are measurement trackers for both men and women.
Here is a blank menu planner:
Then here are the ones I'll be following. Yes, I eat the same thing everyday for a week at a time. It makes it easy to prepare ahead of time and it's SUPER cost effective. I have the first 4 weeks planned. You definitely don't have to follow what I do, by any means. But there might be a meal idea on there for you. :)
Week 1:
Week 2:
Week 3:
Week 4:
For the first 4 weeks I'll be going vegetarian, to help cleanse all the junk that's been building up in my body. I'll be doing strength training but the first few weeks will be MOSTLY cardio, to really help jump start the actual pounds coming off. And to keep me in the competition! ;)
So, to anyone in the competition who is reading this: GOOD LUCK TO US ALL!!! It's going to be amazing and I can't wait to see everyone's "after" pics! And to everyone else reading this, I'm excited to share these things with you and hope someone finds something useful in them. :) I'll have the first video of exercises posted hopefully by next Monday. YAY!
HERE WE GO!
Subscribe to:
Posts (Atom)